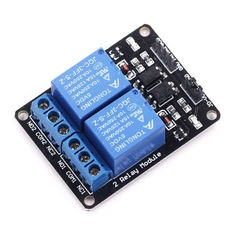
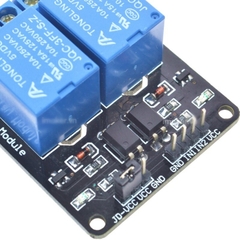
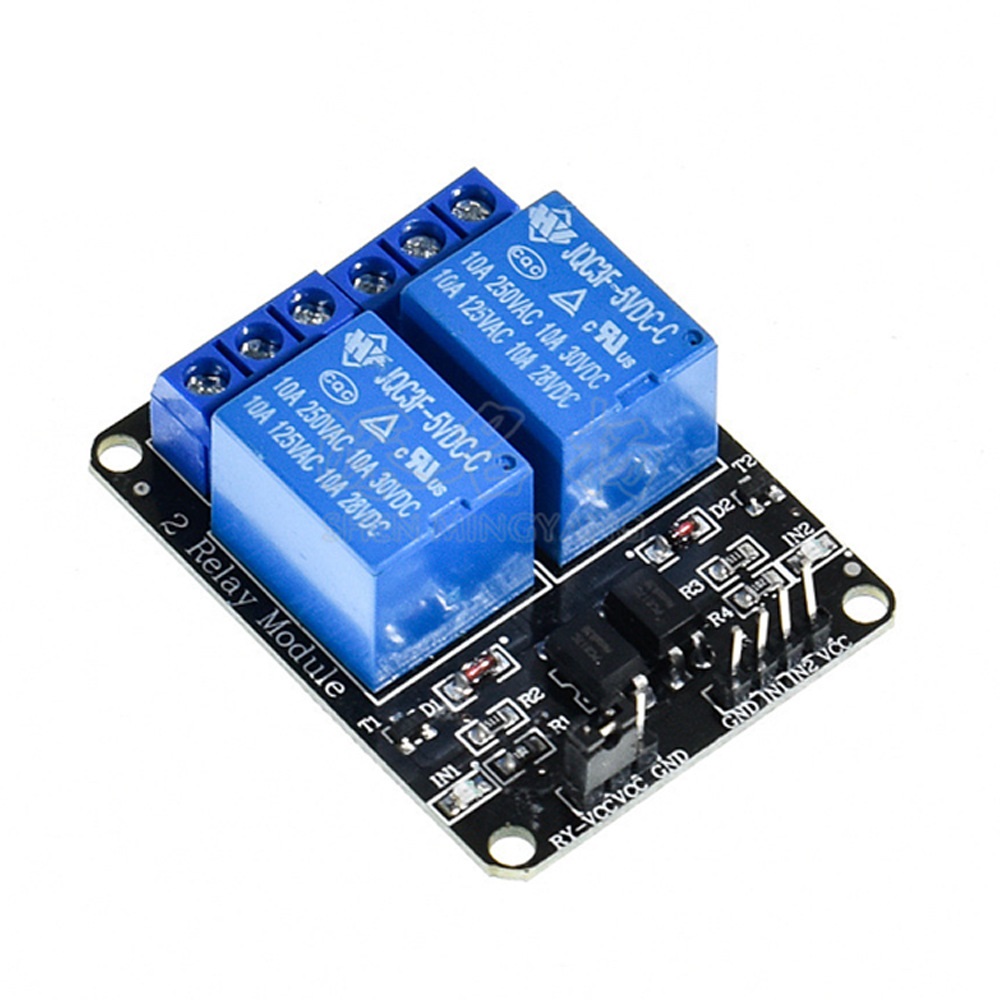
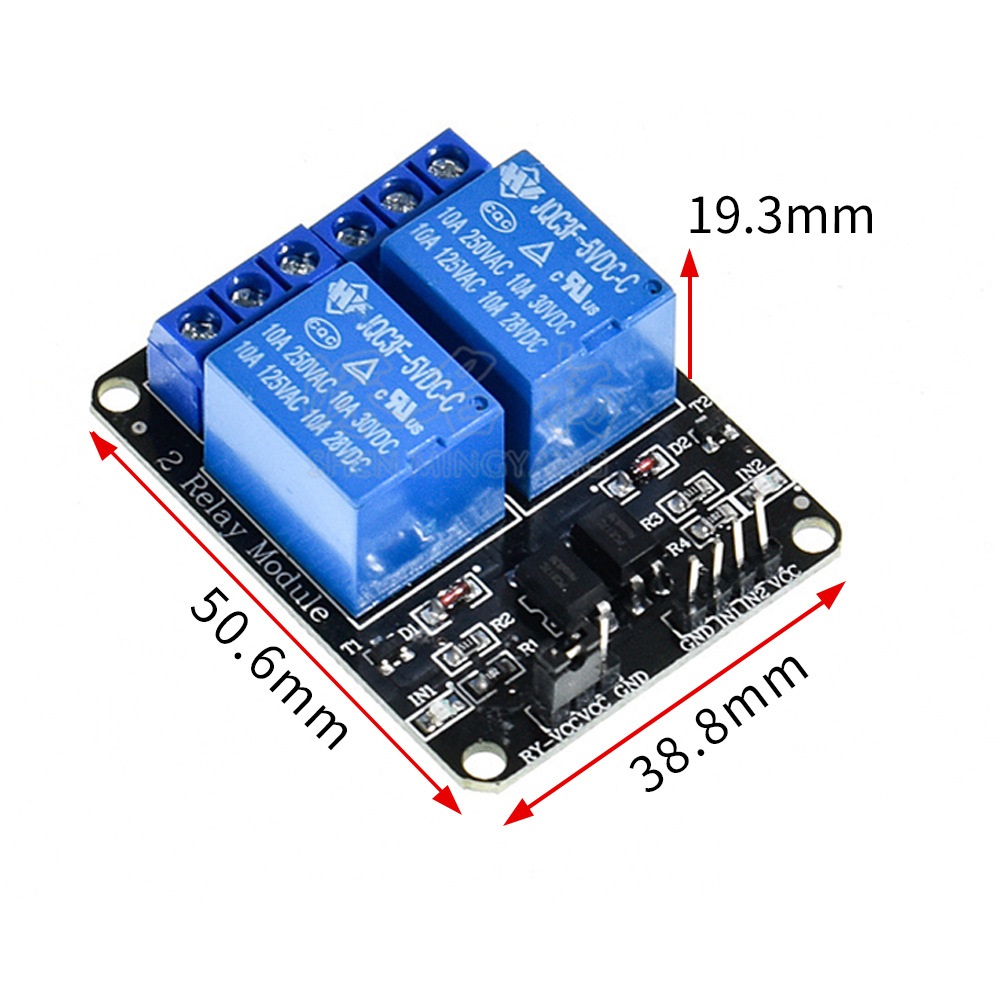
Module 2 Relay với opto cách ly 5v nhỏ gọn, có opto và transistor cách ly giúp cho việc sử dụng trở nên an toàn với board mạch chính, mạch được sử dụng để đóng ngắt nguồn điện công suất cao AC hoặc DC, có thể chọn đóng khi kích mức cao hoặc mức thấp bằng Jumper.
Tiếp điểm đóng ngắt gồm 3 tiếp điểm NC (thường đóng), NO(thường mở) và COM(chân chung) được cách ly hoàn toàn với board mạch chính, ở trạng thái bình thường chưa kích NC sẽ nối với COM, khi có trạng thái kích COM sẽ chuyển sang nối với NO và mất kết nối với NC.
Thông số kỹ thuật:
Code tham khảo Arduino:
/*
* Arduino code (Advanced) change the direction of rotation
* of a DC motor with 2 relays.
* This code can used with High-Level Trigger relay a
* and Low-Level Trigger relay. Watch video for instruction*
* Written by Ahmad Shamshiri for Robojax.com on
* Sunday August 18, 2019
* at 20:22 in Ajax, Ontario, Canada
* Watch video instruction for this code: https://youtu.be/JMBgGO07YLM
*
Get this code and other Arduino codes from Robojax.com
Learn Arduino step by step in structured course with all material, wiring diagram and library
all in once place. Purchase My course on Udemy.com http://robojax.com/L/?id=62If you found this tutorial helpful, please support me so I can continue creating
content like this. You can support me on Patreon http://robojax.com/L/?id=63or make donation using PayPal http://robojax.com/L/?id=64
*
* This code is "AS IS" without warranty or liability. Free to be used as long as you keep this note intact.*
* This code has been download from Robojax.com
This program is free software: you can redistribute it and/or modify
it under the terms of the GNU General Public License as published by
the Free Software Foundation, either version 3 of the License, or
(at your option) any later version.This program is distributed in the hope that it will be useful,
but WITHOUT ANY WARRANTY; without even the implied warranty of
MERCHANTABILITY or FITNESS FOR A PARTICULAR PURPOSE. See the
GNU General Public License for more details.You should have received a copy of the GNU General Public License
along with this program. If not, see <https://www.gnu.org/licenses/>.
*/
int relay1 = 2;
int relay2 = 3;const int triggerType = LOW;// your relay type
int relayOFF, relayON;// relay ON and OFF values for LOW and HIGH Trigger relays
void setup() {
pinMode(relay1, OUTPUT);// set pin as output for relay 1
pinMode(relay2, OUTPUT);// set pin as output for relay 2
if(triggerType ==LOW){
relayON = LOW;
relayOFF = HIGH;
digitalWrite(relay1, relayOFF);//keep both relay OFF so motor is stopped
digitalWrite(relay2, relayOFF);//keep both relay OFF so motor is stopped
}else{
relayON = HIGH;
relayOFF = LOW;
digitalWrite(relay1, relayOFF);//keep both relay OFF so motor is stopped
digitalWrite(relay2, relayOFF);//keep both relay OFF so motor is stopped
}
Serial.begin(9600);// initialize serial monitor with 9600 baud
Serial.println("Robojax Motor Direction of Rotation");
Serial.println("Using 2 Relays");
delay(2000);
}void loop() {
// Rotate in CCW direction
motorCCW();
delay(3000);// wait for 3 secondsmotorStop();
delay(2000);
// Rotate in CW direction
motorCW();
delay(3000);// wait for 3 secondsmotorStop();
delay(2000);
Serial.println("===============");
}// loop end/*
* motorCCW()
* controls the relay so the motor rotates in CCW
*/
void motorCCW()
{
digitalWrite(relay1, relayON);// turn relay 1 ON
digitalWrite(relay2, relayOFF);// turn relay 2 OFF
Serial.println("Rotating in CCW");
}// motorCCW()
/*
* motorCW()
* controls the relay so the motor rotates in CW
*/
void motorCW()
{
digitalWrite(relay1, relayOFF);// turn relay 1 OFF
digitalWrite(relay2, relayON);// turn relay 2 ON
Serial.println("Rotating in CW");
}//motorCW()
/*
* motorStop()
* controls the relay so the motor is stopped
*/
void motorStop()
{
digitalWrite(relay1, relayOFF);// turn relay 1 OFF
digitalWrite(relay2, relayOFF);// turn relay 2 OFf
Serial.println("Stopped"); }
Tài liệu tham khảo:
Video tham khảo:
1. BẢO HÀNH
Bảo hành sản phẩm là: khắc phục những lỗi hỏng hóc, sự cố kỹ thuật xảy ra do lỗi của nhà sản xuất.
1.1. Quy định về bảo hành
– Sản phẩm được bảo hành miễn phí nếu sản phẩm đó còn thời hạn bảo hành được tính kể từ ngày giao hàng, sản phẩm được bảo hành trong thời hạn bảo hành ghi trên Sổ bảo hành, Tem bảo hành và theo quy định của từng hãng sản xuất liên quan đến tất cả các sự cố về mặt kỹ thuật.
– Có Phiếu bảo hành và Tem bảo hành của công ty hoặc nhà phân phối, hãng trên sản phẩm. Trường hợp sản phẩm không có số serial ghi trên Phiếu bảo hành thì phải có Tem bảo hành của CÔNG TY DOLA (kể cả Tem bảo hành gốc).
1.2. Những trường hợp không được bảo hành
– Sản phẩm đã hết thời hạn bảo hành hoặc mất Phiếu bảo hành.
– Số mã vạch, số serial trên sản phẩm không xác định được hoặc sai so với Phiếu bảo hành.
– Tự ý tháo dỡ, sửa chữa bởi các cá nhân hoặc kỹ thuật viên không phải là nhân viên CÔNG TY DOLA
– Sản phẩm bị cháy nổ hay hỏng hóc do tác động cơ học, biến dạng, rơi, vỡ, va đập, bị xước, bị hỏng do ẩm ướt, hoen rỉ, chảy nước, động vật xâm nhập vào, thiên tai, hỏa hoạn, sử dụng sai điện áp quy định.
– Phiếu bảo hành, Tem bảo hành bị rách, không còn Tem bảo hành, Tem bảo hành dán đè, hoặc Tem bảo hành bị sửa đổi (kể cả Tem bảo hành gốc).
– Trường hợp sản phẩm của Quý khách hàng dán Tem bảo hành của CÔNG TY DOLA hay nhầm lẫn thông tin trên Phiếu bảo hành, Phiếu mua hàng: Trong trường hợp này, bộ phận bảo hành sẽ đối chiếu với số phiếu xuất gốc lưu tại Công ty, hóa đơn, phần mềm của Công ty hay thông tin của nhà phân phối, hãng, các Quý khách hàng khác mua cùng sản phẩm cùng thời điểm, nếu có sự sai lệch thì sản phẩm của Quý khách không được bảo hành (có thể Tem bảo hành của Công ty bị thất thoát và bị lợi dụng dán lên thiết bị hay nhầm lẫn nhỏ khi nhập, in ra). Kính mong Quý khách hàng thông cảm!
– Bảo hành không bao gồm vận chuyển hàng và giao hàng.
2. BẢO TRÌ
Bảo trì, bảo dưỡng: bao gồm lau chùi sản phẩm, sửa chữa những hỏng hóc nhỏ có thể sửa được (không bao gồm thay thế thiết bị). Thời gian bảo trì, bảo dưỡng tùy thuộc vào sự thỏa thuận giữa DOLA và Quý khách hàng.